Uneven ground doesn’t have to stop you from building the outdoor space you’ve always wanted. With the right method, you can transform sloped or bumpy areas into a stable and stylish surface. Interlocking deck tiles are an excellent choice because they’re easy to install, require no special tools, and adapt well to irregular bases. They also offer benefits like weather resistance, low maintenance, and endless style possibilities.
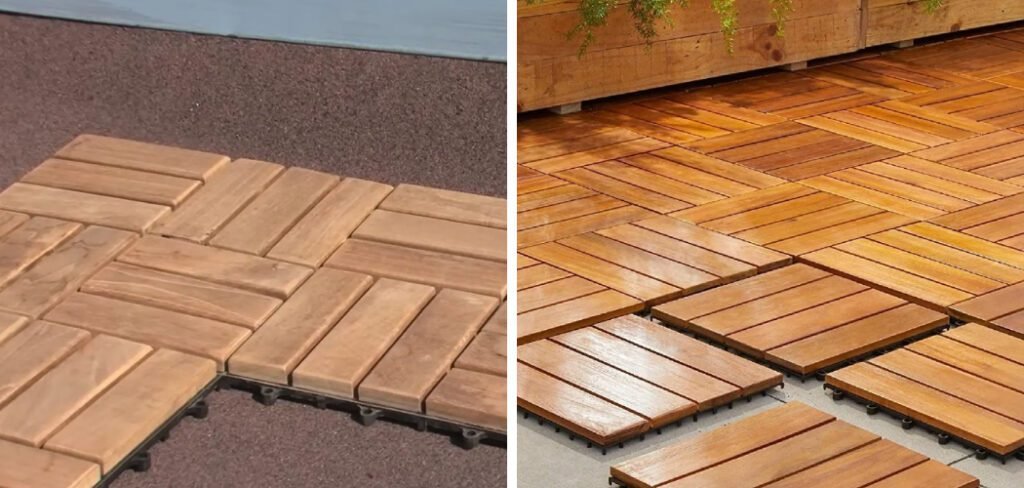
In this guide, you’ll learn how to install interlocking deck tiles on uneven ground step-by-step, including how to prepare the base, level trouble spots, and secure your tiles for long-lasting use. By the end, you’ll know exactly how to create a durable, attractive deck that enhances your backyard—without costly excavation or complex construction.
Why Choose Interlocking Deck Tiles for Uneven Ground?
When you think about how to install interlocking deck tiles on uneven ground, the first advantage that comes to mind is ease of installation. These tiles are designed to click together without specialized tools, making them perfect for both homeowners and renters. Their flexibility allows them to adapt to slight dips, slopes, or bumps, creating a stable walking surface.
Beyond functionality, they add a polished, modern look to any outdoor area. Built from durable materials like composite or hardwood, they can withstand weather extremes and heavy use. With minimal prep, you can transform tricky terrain into a stylish, comfortable deck.
Common Installation Challenges & How to Overcome Them
When learning how to install interlocking deck tiles on uneven ground, you may face a few common issues. Poor drainage can cause water pooling, leading to slippery surfaces or damage over time. To fix this, create a slight slope or add a drainage layer beneath the tiles. Shifting tiles often results from an unstable base—compact the ground or add an underlayment for extra grip.

Height inconsistencies between tiles can be solved by trimming edges or filling low spots with sand or gravel. By addressing these challenges early, you’ll ensure a safer, more attractive, and longer-lasting deck that performs well in any season.
Tools & Materials You’ll Need
Before you start learning how to install interlocking deck tiles on uneven ground, gather the right tools and materials to make the process smooth and efficient.
Tools:
- Rubber mallet
- Measuring tape
- Level
- Jigsaw or hand saw
- Chalk line
Materials:
- Interlocking deck tiles
- Underlayment or landscape fabric
- Shims or leveling material
- Optional edging strips
Having these essentials ready will save time, reduce mistakes, and help you achieve a professional-looking result, even if the surface is uneven or has multiple slopes.
10 Easy Steps for How to Install Interlocking Deck Tiles on Uneven Ground
Step 1: Assess and Measure the Area
Start by measuring your backyard with a tape measure. Outline the corners using a chalk line for accuracy. Note dips, slopes, and high points that may affect tile placement. Consider where furniture or planters will go. Having a level handy ensures straight alignment.
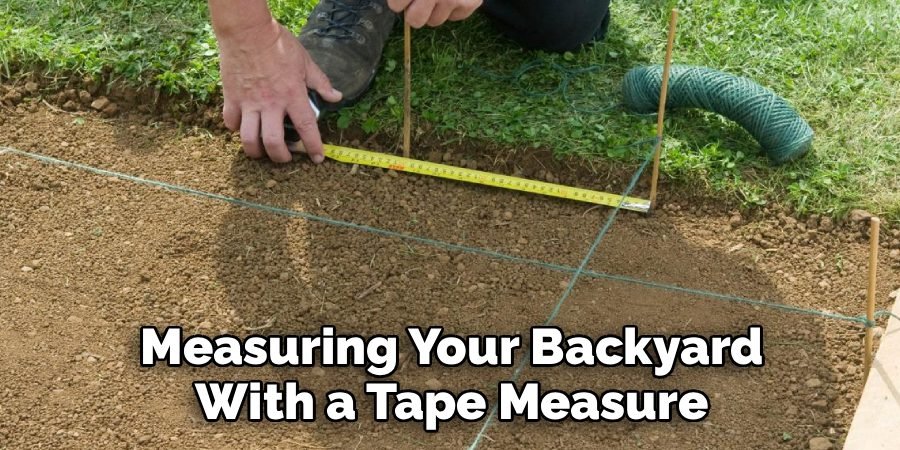
Proper assessment now prevents problems later and creates a solid start for your how to install interlocking deck tiles on uneven ground project. Planning carefully also saves time and frustration during installation.
Step 2: Clear and Prepare the Ground
Remove grass, rocks, roots, and debris with a shovel and rake. Smooth out high spots and remove loose dirt. Gloves and sturdy shoes protect your hands and feet. Clearing the area properly ensures the tiles will sit flat. Preparing the ground well makes the installation process faster and reduces the risk of tiles shifting or wobbling. This step also keeps the deck safe for walking and furniture placement.
Step 3: Level High Spots and Fill Low Areas
Use sand, gravel, or shims to fill dips and tamp down high points. Check the surface with a level to ensure it is flat. Small adjustments now prevent tiles from rocking and gaps from forming. Lightly tap shims or sand with a rubber mallet for evenness. A well-level base ensures comfort when walking and stability for furniture.
Proper leveling is essential for the longevity of your how to install interlocking deck tiles on uneven ground project.
Step 4: Install a Weed Barrier or Underlayment
Roll out landscape fabric or underlayment across the prepared surface. Overlap edges to prevent weeds from growing through gaps. Secure the material with stakes or small rocks. The barrier improves drainage and reduces moisture pooling under the tiles. Using the right underlayment prevents tiles from shifting later and keeps the deck low-maintenance. Installing this layer correctly is crucial before adding the tiles for a smooth, even surface.
Step 5: Plan Your Tile Layout Before Locking
Lay tiles loosely across the area to visualize the design. Try straight rows, staggered patterns, or herringbone arrangements. Measure corners and edges with a tape measure. Proper planning prevents awkward cuts and ensures a polished final look. For inspiration, check DIY Pallet Garden Trellis for Tomatoes, which works well with backyard decking.
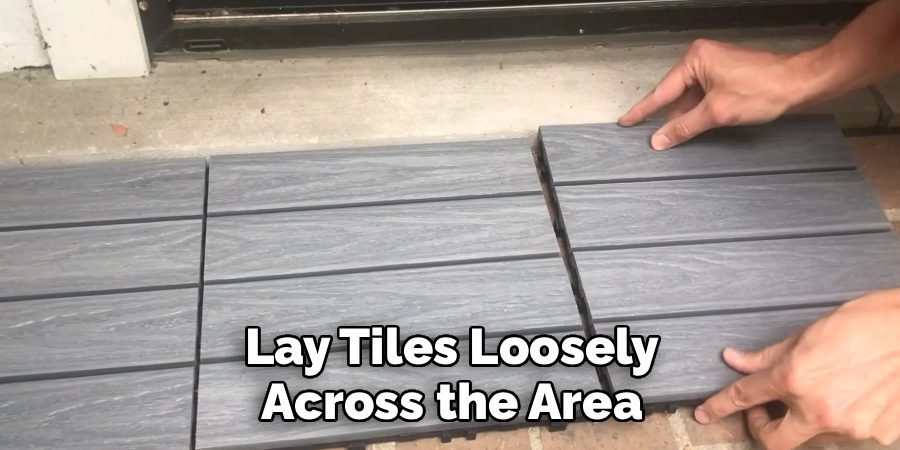
Visualizing the layout ahead makes installation faster and easier and ensures your how to install interlocking deck tiles on uneven ground project looks professional.
Step 6: Start Installing Tiles from a Corner
Begin at a corner and connect the interlocking tabs. Gently tap each tile with a rubber mallet to lock them together. Keep rows straight and spacing even. Step back to check alignment and make small adjustments. Starting from a corner ensures the tiles fit snugly and creates a clean, finished appearance.
Using a level during installation helps maintain consistency across the deck. This step keeps the layout organized without including the main keyword here.
Step 7: Adjust for Uneven Spots with Shims
Place thin shims under tiles where the ground dips. Multiple thin layers work better than a thick single shim. Check each tile with a level to prevent wobbling. Shims and sand help fine-tune uneven areas. Adjusting during installation keeps the deck comfortable and safe to walk on.
Proper shimming supports the interlocking system and ensures durability. This step is important for maintaining the stability of your how to install interlocking deck tiles on uneven ground project.
Step 8: Cut Tiles to Fit Edges and Corners
Measure areas where full tiles will not fit and mark carefully. Cut with a jigsaw or handsaw, wearing gloves and goggles for safety. Fit trimmed tiles along walls, fences, or curves for a polished appearance. Accurate cutting prevents gaps and maintains stability.
Properly fitting edge tiles enhances the overall look and longevity of your deck. This step is a key part of your how to install interlocking deck tiles on uneven ground project and ensures a professional finish.
Step 9: Check Alignment and Secure Connections
Press all tiles together and ensure interlocking tabs are fully engaged. Adjust any misaligned tiles immediately. Check edges, corners, and entire rows to avoid gaps. Tap lightly with a rubber mallet if needed. For complementary backyard projects, see how to build a vertical planter wall using pallets.
Checking alignment now prevents shifting later and keeps your how to install interlocking deck tiles on uneven ground project safe, stable, and visually appealing.
Step 10: Add Edging and Enjoy Your Finished Deck
Install optional edging strips around the deck perimeter for a clean, finished look. Sweep the surface to remove dust, dirt, and debris. Step back and enjoy your completed deck. Your interlocking tiles now create a functional, attractive, and durable outdoor space. Adding furniture, rugs, or planters can enhance the area.

Completing this final step ensures your how to install interlocking deck tiles on uneven ground project is ready for everyday use and will last for years.
Common Mistakes to Avoid
When installing interlocking deck tiles on uneven ground, avoiding these errors ensures your deck stays level, secure, and long-lasting.
- Skipping Ground Prep – Not clearing debris or leveling the area can make tiles unstable.
- Not Accounting for Drainage Slope – Poor slope design traps water, causing rot, mold, or damage.
- Forcing Tiles Without Alignment – Misaligned connections weaken locks and shorten lifespan.
- Ignoring Low Spots – Unfilled dips create gaps, wobbling, and trip hazards.
- Using the Wrong Underlayment – Incompatible material reduces comfort and support.
- Overlooking Expansion Gaps – Tiles need space to expand in heat to prevent warping.
- Not Securing Edging – Loose edges lead to shifting over time.
Following these tips helps your how to install interlocking deck tiles on uneven ground project stay stable, safe, and durable.
Maintenance Tips for Long-Lasting Results
To keep your outdoor space looking great after you’ve learned how to install interlocking deck tiles on uneven ground, regular care is essential.
- Follow a Seasonal Cleaning Schedule – Sweep off debris weekly and wash tiles each season to prevent mold, mildew, and staining.
- Apply a UV Seal – Use a UV-protective sealant annually to protect color and prevent fading from sunlight exposure.
- Check Locks and Connections – Inspect and tighten tile joints every few months to avoid shifting or separation.
- Monitor for Drainage Issues – Ensure water flows away properly to prevent pooling and damage.
- Replace Damaged Tiles Promptly – Swap out cracked or worn tiles to maintain safety and appearance.
Consistent upkeep will extend your deck’s life and beauty.
Cost, Time & Tile Calculator
Planning your project ahead helps avoid surprises. On average, installing interlocking deck tiles on uneven ground costs $8–$15 per square foot, depending on tile quality and underlayment choice.
| Item | Estimated Cost Range |
| Interlocking Deck Tiles | $6–$12 per sq. ft. |
| Underlayment/Weed Barrier | $0.50–$1 per sq. ft. |
| Edging & Accessories | $1–$2 per sq. ft. |
Most DIY installations take 4–8 hours for a medium-sized deck. To calculate tile quantity, measure your total square footage, divide by one tile’s coverage, and add 10% extra for cuts and replacements. This ensures you have enough for a perfect fit without delays.
Frequently Asked Questions
Can I Install Deck Tiles Over Dirt?
Yes, you can. For best results, compact the soil and add a weed barrier. In projects like how to install interlocking deck tiles on uneven ground, a firm base keeps tiles level and prevents shifting over time.

Will They Work on a Sloped Backyard?
Yes, but you need to level high spots and fill low areas. Minor slopes can be adjusted with shims, while steeper inclines may require retaining edges.
Do I Need a Base Layer?
A base layer, such as gravel, sand, or underlayment, helps with drainage and stability. It also reduces weeds and extends tile life.
How Do I Clean Them?
Sweep or use a leaf blower for debris. Use a garden hose for deeper cleaning. For more outdoor flooring ideas, check our DIY garden structure projects to complement your deck.
Conclusion
Installing interlocking deck tiles on uneven ground is a smart, cost-effective way to upgrade any outdoor area. These tiles are flexible, easy to work with, and give your backyard a neat, polished look. Properly preparing the ground, leveling high and low spots, and using the right underlayment ensure your deck stays stable and long-lasting.
Once installed, it becomes perfect for relaxing, entertaining, or adding furniture and décor. By following these steps, your project will be smooth and enjoyable. Start today and see how how to install interlocking deck tiles on uneven ground can transform your backyard into a functional and attractive outdoor space.
You Can Check It Out to Painted Checkerboard Concrete Patio DIY

Hey there! I’m Ryan J. Cooper, a DIY enthusiast with over a decade of hands-on backyard experience. At YardFixes.com, I share practical, real-life tips to help you build, repair, and transform your outdoor spaces—no matter your skill level.

